09 / Optional integrations
Newsletter, contact form & wishlist
Connect only the services you plan to use. Forms need their own configuration to deliver data.
Connect the Footer newsletter
- Install and activate MC4WP: Mailchimp for WordPress.
- In the plugin’s Mailchimp settings, enter your own API key directly in WordPress and confirm the connection. Do not put a key in the theme or share it in a public support ticket.
- Create a published signup form. Select the intended Audience in its settings and review its subscription/confirmation options.
- Use the Purlia form markup below if you want the matching email-and-arrow layout. Save the form.
- Edit the Footer, select its MC4WP block and choose your form. If the block is absent, insert the plugin’s form block into the newsletter group.
- Test using an address you control and confirm the expected result in Mailchimp, including any confirmation step.
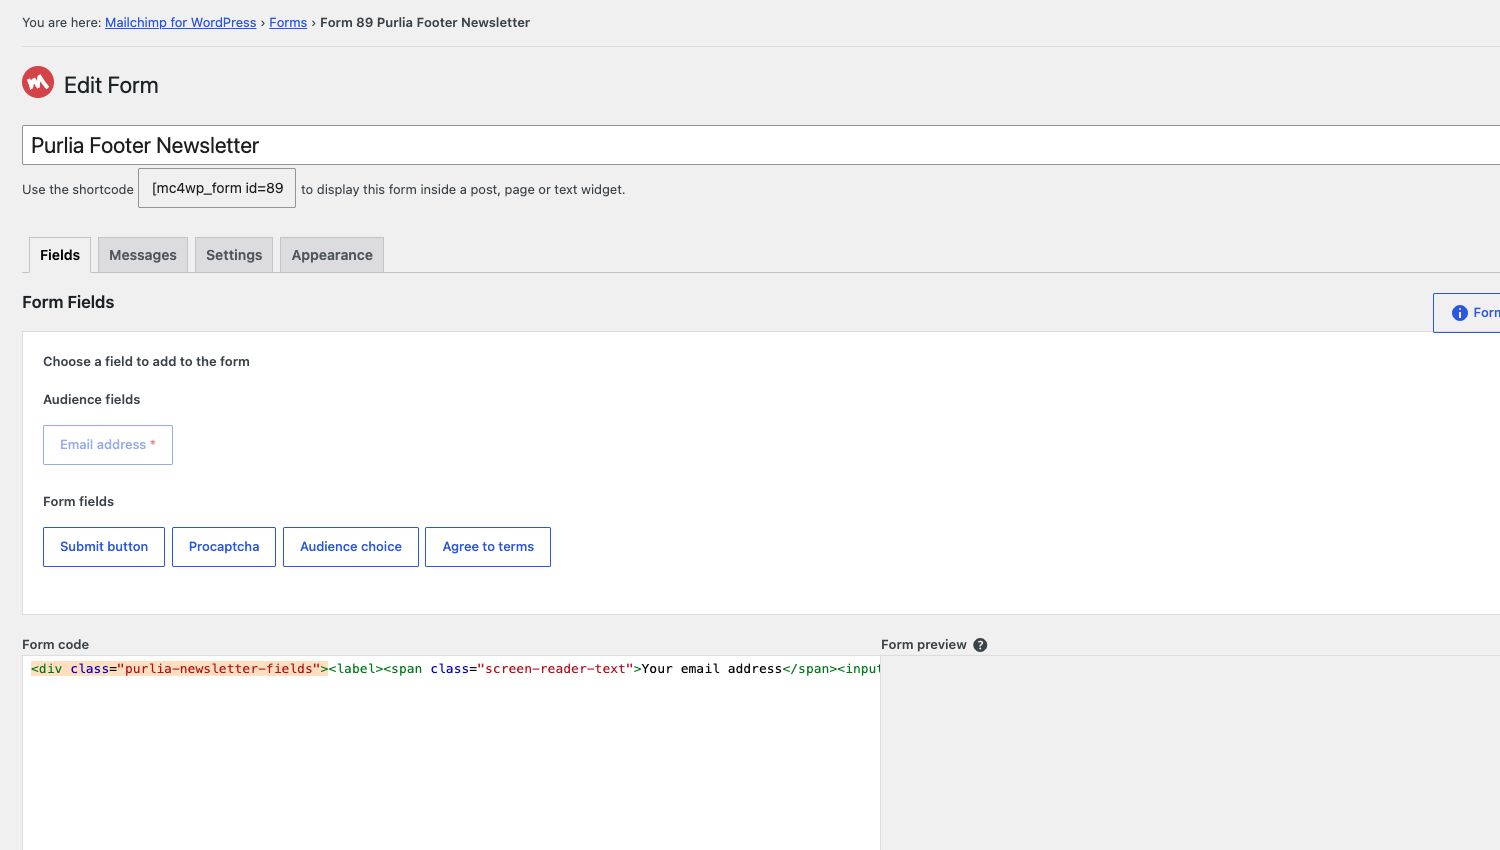
Newsletter form markup
Paste this into the MC4WP form editor, not a page’s Custom HTML block. The plugin provides the outer form and handles submission. Add any consent wording required for your own store; the snippet is a layout starting point.
<div class="purlia-newsletter-fields">
  <label>
    <span class="screen-reader-text">Your email address</span>
    <input type="email" name="EMAIL" placeholder="Your email address"
      autocomplete="email" required />
  </label>
  <button type="submit" aria-label="Subscribe to the newsletter">→</button>
</div>Further reading: MC4WP signup form setup.
Add a WPForms contact form
- Install and activate WPForms, then create your form in its own editor.
- Add the fields you need, such as Name, Email and Message. Set the recipient notification address and a useful confirmation message.
- Open the Contact page, select its WPForms block and choose the new form. If the pattern shows availability text instead of a form block, replace that text with a WPForms block.
- Preview the actual page and submit a controlled test. Check the recipient’s inbox/spam folder and the configured form response.
- If delivery fails, inspect the form’s notification and your WordPress email setup. Styling alone cannot deliver an email.
Further reading: WPForms block placement.
Use the optional Purlia Wishlist plugin
Wishlist is a separate optional plugin, not a feature required to activate the theme. If ApusThemes supplies its ZIP with your purchase or separately, install it using Plugins → Add New → Upload Plugin and activate it.
- Create or select the Wishlist page with slug
wishlist. - Add a Shortcode block containing the plugin output:
[purlia_wishlist]Apply the Wishlist template if needed, then test saving/removing products. If the separate plugin was not supplied, skip this integration and remove wishlist links you do not want to expose. Do not install an unrelated similarly named plugin and expect identical behavior.
Before publishing any form
- Select a real form created on the current site; an imported numeric form ID can refer to nothing or to a different form.
- Use clear field labels and understandable validation messages.
- Configure account/service settings in the plugin rather than in theme files.
- Verify actual delivery/subscription behavior with controlled test data.
- Update your store’s data and consent information to match the services you enable.